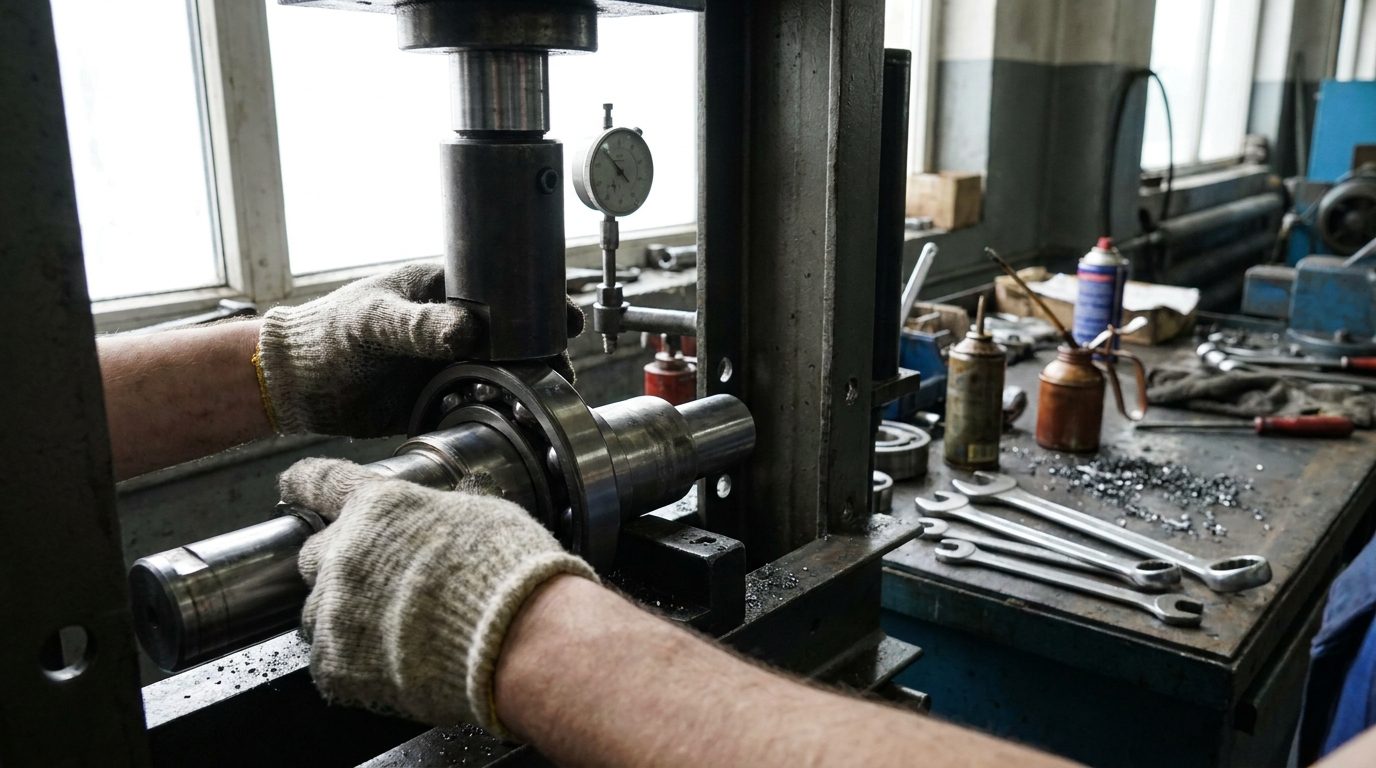
Proper bearing installation is one of the most important procedures for protecting gearbox reliability, reducing unplanned downtime, and extending bearing and gear life in industrial equipment. Even a high-quality bearing from a reputable manufacturer can fail prematurely if it is handled incorrectly, mounted with the wrong force, contaminated during installation, or operated with improper fits, lubrication, or alignment. For maintenance managers, plant engineers, reliability engineers, mechanics, and purchasing teams, the goal is not simply to “get the bearing on the shaft.” The goal is to install it in a controlled, measurable, repeatable way that supports long-term gearbox performance and lowers total cost of ownership.
Proper bearing installation requires clean handling, correct bearing identification, inspection of shafts and housings, verification of tolerances and fits, controlled mounting force, correct heating or hydraulic techniques, proper lubrication, accurate alignment, and post-installation testing. Never hammer directly on a bearing, never transmit mounting force through rolling elements, and never install bearings in a contaminated work area. Most premature bearing failures are caused by improper installation, lubrication errors, contamination, misalignment, or incorrect fits. Following manufacturer procedures from sources such as SKF, Timken, AGMA, and Noria helps reduce gearbox failures and improve reliability.
Proper bearing installation procedures are crucial for ensuring the longevity and performance of machinery. For those looking to deepen their understanding of related maintenance practices, you can refer to an informative article on industrial gearbox repair, which highlights essential techniques and considerations. To explore this resource, visit Industrial Gearbox Repair in Jonesboro, Arkansas.
Why Proper Bearing Installation Matters in Industrial Gearboxes
Bearings support rotating shafts, control axial and radial loads, maintain gear mesh alignment, and allow industrial gearboxes to transmit power efficiently. When a bearing is installed incorrectly, the damage may not be visible immediately. However, the bearing can develop subsurface cracks, raceway dents, cage damage, misalignment stress, or lubricant film failure that shortens service life.
In a gearbox, bearing failure can quickly become a larger mechanical problem. A damaged bearing can cause shaft movement, which can lead to gear tooth misalignment, abnormal vibration, increased heat, seal failure, lubricant contamination, and catastrophic gearbox damage.
For plants operating conveyors, mixers, crushers, cooling towers, extruders, paper machines, wastewater equipment, mining drives, or heavy manufacturing systems, bearing installation quality directly affects uptime.
Common consequences of poor installation include:
- Premature bearing failure
- Gear mesh misalignment
- Shaft scoring or fretting
- Housing bore damage
- Excessive heat generation
- Increased vibration and noise
- Lubricant breakdown
- Seal leakage
- Repeat gearbox failures
- Higher maintenance and replacement costs
If your facility is experiencing repeated gearbox bearing failures, Industrial Gearbox Solutions can help evaluate root causes through gearbox repair services, gearbox inspection and failure analysis, and industrial gearbox rebuilding.
Common Causes of Bearing Installation Failure
Contamination During Handling or Assembly
Contamination is one of the leading causes of bearing failure. Dirt, metal chips, abrasive dust, lint, moisture, and old lubricant particles can enter the bearing during installation. Even tiny particles can dent raceways and rolling elements, causing noise, vibration, and spalling.
Common contamination sources include:
- Dirty benches or work carts
- Open bearing packages
- Wiping bearings with contaminated rags
- Installing bearings near grinding, welding, or machining work
- Reusing dirty lubricant
- Failing to clean housings, shafts, and covers
- Leaving gearboxes open too long during maintenance
According to Noria, contamination control is a foundational part of lubrication reliability. Clean storage, clean transfer containers, filtered oil, and sealed components all help prevent early bearing damage.
Incorrect Shaft or Housing Fits
Bearing fits determine how securely the bearing seats on the shaft and in the housing. If the fit is too loose, the bearing may creep, spin, fret, or generate heat. If the fit is too tight, excessive internal clearance reduction can cause overheating, stress, and premature failure.
Fit selection depends on:
- Bearing type
- Shaft diameter
- Load direction
- Rotational speed
- Temperature
- Gearbox design
- Load magnitude
- Whether the inner or outer ring rotates relative to the load
For precision applications, always compare actual measurements against manufacturer tolerance tables from SKF, Timken, or the gearbox OEM.
Improper Mounting Force
One of the most damaging installation mistakes is applying force through the rolling elements. For example, pressing on the outer ring to install a bearing onto a shaft can transmit force through balls or rollers, denting the raceways. This creates brinelling or false brinelling patterns that later appear as vibration, noise, and spalling.
Correct force application:
- Press on the inner ring when mounting onto a shaft.
- Press on the outer ring when mounting into a housing.
- Support both rings when installing both simultaneously.
- Use sleeves, press tools, induction heaters, or hydraulic nuts as appropriate.
- Never strike a bearing directly with a hammer.
Overheating During Thermal Mounting
Thermal mounting is commonly used for interference fits. Heating expands the bearing bore, allowing it to slide onto the shaft with less force. However, overheating can damage bearing metallurgy, seals, cages, or lubricant.
General best practice:
- Use an induction heater with temperature control.
- Avoid open flames.
- Heat evenly.
- Follow manufacturer temperature limits.
- Do not heat sealed or pre-lubricated bearings beyond approved limits.
- Install promptly before the bearing cools.
SKF and Timken both provide detailed bearing mounting guidelines for thermal installation methods.
Misalignment
Misalignment can occur when housings are worn, shafts are bent, shoulders are not square, or the bearing is cocked during installation. Misalignment produces uneven load distribution across the rolling elements and raceways.
Symptoms may include:
- Edge loading
- High vibration
- Increased bearing temperature
- Uneven wear patterns
- Short bearing life
- Gear contact pattern problems
In industrial gearboxes, bearing alignment is especially important because shaft location affects gear mesh geometry.
Poor Lubrication Practices
Lubrication errors can defeat even the best installation procedure. Bearings require the correct lubricant type, viscosity, quantity, cleanliness, and delivery method.
Common lubrication mistakes include:
- Using the wrong oil viscosity
- Mixing incompatible greases
- Overgreasing
- Undergreasing
- Using contaminated oil
- Failing to flush old lubricant
- Ignoring breather condition
- Operating with degraded oil
Noria’s lubrication best practices emphasize oil cleanliness, correct lubricant selection, and routine analysis to prevent bearing and gear damage.
Industrial gearbox bearing failure can lead to costly downtime and repairs, so it’s important to address the issue promptly. Industrial gearbox bearing failure
Symptoms of Improper Bearing Installation
Early Warning Signs
Bearing installation problems often appear soon after startup. Maintenance teams should monitor gearbox behavior closely after bearing replacement.
Early symptoms include:
- Unusual noise after startup
- Rising bearing temperature
- Increased vibration amplitude
- Axial or radial movement
- Oil leaks near seals
- Higher motor current draw
- Abnormal gearbox sound under load
- Metallic particles in oil
- Rapid lubricant discoloration
Vibration Indicators
Vibration analysis is one of the best tools for identifying installation-related defects. Common vibration clues include:
- Ball pass frequency defects
- Outer race defect frequencies
- Inner race defect frequencies
- Cage frequency issues
- Harmonics from looseness
- High axial vibration from misalignment
- Gear mesh frequency sidebands from shaft movement
Reliability engineers should compare vibration readings before and after installation to confirm whether the repair improved or worsened machine condition.
Temperature Indicators
A bearing that runs hotter than expected after installation may have:
- Excessive interference fit
- Reduced internal clearance
- Overlubrication
- Underlubrication
- Misalignment
- Excessive preload
- Seal drag
- Contaminated lubricant
- Improper bearing selection
A short temperature rise during run-in can be normal, but continuous heating or temperature instability should be investigated immediately.
Oil and Debris Indicators
Gearbox oil can reveal bearing installation problems. Inspect the lubricant for:
- Metallic flakes
- Bronze or brass cage particles
- Darkened oil
- Burnt odor
- Water contamination
- Excessive foam
- Magnetic debris
- Dirt and abrasive particles
Oil analysis and ferrography can help identify whether debris comes from bearings, gears, shafts, or housings.
Proper bearing installation procedures are crucial for ensuring the longevity and efficiency of machinery. For those looking to deepen their understanding of this topic, a related article discusses essential techniques and best practices for bearing installation. You can read more about it in this informative piece on industrial gearbox repair, which highlights the importance of precision and care in the installation process. Following these guidelines can significantly reduce the risk of premature bearing failure and enhance overall equipment performance.
Key Procedures for Proper Bearing Installation
| Procedure | Details |
|---|---|
| Cleanliness | Ensure the work area and components are clean and free from contaminants. |
| Inspection | Thoroughly inspect the bearing and surrounding components for any damage or wear. |
| Proper Tools | Use the correct tools and equipment for installation to avoid damage to the bearing. |
| Correct Fit | Ensure the bearing is properly sized and fits securely in the housing or onto the shaft. |
| Lubrication | Apply the appropriate lubricant to the bearing to reduce friction and prevent premature wear. |
| Alignment | Check and adjust the alignment of the bearing to prevent excessive load and wear. |
Step 1: Confirm the Correct Bearing
Before opening the package, verify that the bearing is correct for the gearbox application.
Check:
- Bearing number
- Internal clearance class
- Cage type
- Seal or shield configuration
- Precision class
- Lubrication requirements
- Load rating
- Speed rating
- Manufacturer specifications
- OEM part number
Do not assume that a visually similar bearing is interchangeable. A small difference in clearance, cage material, or internal geometry can change operating performance.
Step 2: Prepare a Clean Work Area
Cleanliness is essential. Bearings should not be installed on dirty benches, near grinders, or in areas exposed to dust.
Best practices include:
- Use a clean, dry assembly area.
- Keep bearings in original packaging until installation.
- Clean tools before use.
- Cover open gearboxes when work is paused.
- Use lint-free wipes.
- Wear clean gloves.
- Keep compressed air away from exposed bearings unless filtered and moisture-free.
- Do not spin dry bearings with compressed air.
Step 3: Inspect the Shaft and Housing
Before installing the bearing, inspect all mating surfaces. A new bearing installed on a damaged shaft or housing will not perform properly.
Inspect for:
- Scoring
- Fretting
- Corrosion
- Burrs
- Out-of-round conditions
- Taper
- Oversized or undersized fits
- Shoulder damage
- Cracked housings
- Distorted bores
- Previous bearing creep marks
Use calibrated tools such as micrometers, bore gauges, dial indicators, and surface finish gauges where required.
Step 4: Verify Shaft and Housing Dimensions
Measure shaft journals and housing bores at multiple points. Do not rely on nominal dimensions or visual inspection alone.
Recommended measurement points:
| Component | Measurement Method | What to Check |
||:||
| Shaft journal | Outside micrometer | Diameter, taper, out-of-round |
| Housing bore | Bore gauge | Diameter, roundness, distortion |
| Shaft shoulder | Dial indicator or square | Squareness and runout |
| Housing shoulder | Visual and dimensional inspection | Burrs, wear, contact surface |
| Bearing seat | Surface finish gauge | Roughness and fretting damage |
| Keyways/splines nearby | Visual inspection | Cracks, burrs, deformation |
Document measurements in the maintenance record. If a shaft or housing is out of tolerance, replacement or repair may be necessary before installation.
Step 5: Select the Correct Mounting Method
The mounting method depends on bearing type, size, fit, and gearbox design.
Common methods include:
| Mounting Method | Best Used For | Key Precaution |
||||
| Mechanical press | Small to medium bearings | Apply force only to the ring being fitted |
| Induction heating | Interference fits on shafts | Control temperature carefully |
| Oil bath heating | Some open bearings | Avoid contamination and overheating |
| Hydraulic mounting | Large tapered bore bearings | Monitor drive-up and clearance reduction |
| Adapter sleeve mounting | Tapered bore bearings | Measure clearance before and after |
| Freeze fitting | Some housing applications | Prevent condensation and corrosion |
For large industrial gearboxes, hydraulic or thermal methods are often preferred because they reduce impact damage and improve installation control.
Step 6: Install Without Damaging the Bearing
During installation:
- Keep the bearing square to the shaft or bore.
- Use steady, even pressure.
- Do not cock or tilt the bearing.
- Do not hammer directly on the ring.
- Do not press through rolling elements.
- Stop if abnormal resistance occurs.
- Confirm full seating against the shoulder.
- Allow thermally mounted bearings to cool and lock in position.
If a bearing stops before seating fully, do not force it blindly. Remove it if possible and inspect for burrs, incorrect fit, misalignment, or wrong bearing size.
Step 7: Verify Internal Clearance or Preload
Some bearings require internal clearance checks before and after mounting. Tapered roller bearings and spherical roller bearings often require particular attention to clearance reduction or preload.
Important checks include:
- Radial internal clearance
- Axial endplay
- Preload setting
- Spacer thickness
- Locknut torque
- Bearing drive-up distance
- Shaft expansion allowance
- Thermal growth conditions
Timken provides guidance for tapered roller bearing setting, including endplay and preload considerations. SKF also provides mounting and clearance reduction recommendations for spherical roller bearings and other bearing types.
Step 8: Lubricate Correctly
Before startup, confirm the bearing receives the correct lubricant.
Check:
- Oil type or grease type
- Viscosity grade
- Additive compatibility
- Grease thickener compatibility
- Fill quantity
- Oil level
- Filtration condition
- Lubricant cleanliness
- Lubricant delivery path
In gearboxes, bearing lubrication may come from splash lubrication, circulating oil systems, oil mist, grease, or forced lubrication. Verify that oil passages, slingers, pumps, and spray nozzles are clean and functional.
Step 9: Reassemble Seals, Covers, and Retainers Correctly
Bearing installation does not end when the bearing is seated. Incorrect reassembly can cause contamination, leakage, misalignment, or preload changes.
Inspect and install:
- Oil seals
- Labyrinth seals
- Bearing covers
- Shims
- Spacers
- Locknuts
- Retaining rings
- End caps
- Gaskets
- O-rings
- Breathers
Replace worn seals and gaskets during bearing replacement. Reusing hardened or damaged seals can allow contamination into the gearbox and oil out of the gearbox.
Step 10: Perform Controlled Startup and Verification
After installation, run the gearbox under controlled conditions.
Startup checks:
- Rotate shaft manually before power-up.
- Confirm no binding or abnormal resistance.
- Verify lubricant level.
- Check coupling alignment.
- Confirm guards are installed.
- Start unloaded if possible.
- Monitor temperature.
- Listen for abnormal noise.
- Record vibration baseline.
- Inspect for leaks.
- Recheck fastener torque if required.
A successful installation should produce stable temperature, acceptable vibration, normal sound, and no evidence of leakage or abnormal movement.
Bearing Inspection Methods Before and After Installation
Visual Inspection
Visual inspection can reveal many problems before installation.
Look for:
- Rust
- Nicks
- Dents
- Cracked rings
- Damaged cages
- Seal damage
- Discoloration
- Packaging damage
- Contamination
- Improper markings
Do not install a bearing that has been dropped, mishandled, or stored improperly without further inspection.
Dimensional Inspection
Dimensional checks are essential for critical gearboxes. Measure not only the bearing, but also the related components.
Critical dimensions include:
- Shaft journal diameter
- Housing bore diameter
- Shaft shoulder runout
- Housing face flatness
- Spacer thickness
- End cover depth
- Locknut thread condition
- Bearing seat width
Clearance and Endplay Measurement
Depending on bearing type, use feeler gauges, dial indicators, or manufacturer-specific tools to verify clearance and endplay.
For tapered roller bearings, improper preload or excessive endplay can cause heat, vibration, and gear alignment issues. For spherical roller bearings, incorrect clearance reduction can lead to overheating or looseness.
Contact Pattern Inspection
In gearbox applications, bearing installation can affect gear tooth contact. After assembly, inspect gear contact patterns where possible.
Poor bearing installation may cause:
- Contact biased toward one end of the tooth
- Uneven load distribution
- Abnormal backlash
- Noise under load
- Accelerated gear wear
For gearbox standards and engineering guidance, AGMA is a key authority for gear design, lubrication, and reliability practices.
Vibration and Temperature Trending
Post-installation condition monitoring should include:
- Baseline vibration reading
- Bearing defect frequency analysis
- Gear mesh frequency analysis
- Temperature trend
- Oil sample baseline
- Noise observation
- Load and speed recording
The baseline is valuable for future predictive maintenance.
Troubleshooting Bearing Installation Problems
Problem: Bearing Runs Hot After Installation
Possible causes:
- Excessive interference fit
- Too much preload
- Too little internal clearance
- Overgreasing
- Wrong lubricant
- Misalignment
- Seal rubbing
- Insufficient oil flow
- Bearing cocked during mounting
Recommended actions:
- Confirm lubricant type and quantity.
- Check alignment.
- Measure operating temperature trend.
- Inspect seals for drag.
- Verify preload or endplay.
- Review fit measurements.
- Check oil flow or splash path.
Problem: Bearing Is Noisy Immediately After Startup
Possible causes:
- Contamination
- Brinelling from improper mounting
- Damaged bearing
- Incorrect bearing type
- Insufficient lubrication
- Gear mesh issue
- Loose housing fit
Recommended actions:
- Stop and inspect if noise is severe.
- Check oil for debris.
- Run vibration analysis.
- Confirm bearing part number.
- Review installation method.
- Inspect for shaft or housing looseness.
Problem: Bearing Will Not Seat Properly
Possible causes:
- Burr on shaft or housing
- Incorrect bearing size
- Shaft out-of-round
- Housing distortion
- Bearing misalignment during pressing
- Thermal mounting temperature too low
- Shoulder damage
Recommended actions:
- Stop pressing.
- Remove bearing carefully if possible.
- Inspect mating surfaces.
- Re-measure dimensions.
- Deburr and clean.
- Confirm bearing specification.
- Use correct mounting equipment.
Problem: Repeated Bearing Failures in Same Gearbox
Possible causes:
- Misalignment
- Incorrect bearing selection
- Lubrication contamination
- Shaft deflection
- Housing bore wear
- Improper preload
- Overloading
- Gear damage
- Soft foot or base distortion
- Thermal growth not considered
Recommended actions:
- Perform root cause failure analysis.
- Inspect gearbox housing and shafts.
- Review operating load and duty cycle.
- Analyze oil and debris.
- Check gear contact pattern.
- Verify fits and tolerances.
- Review installation records.
- Consider professional gearbox rebuild evaluation.
For repeat failures, consider contacting Industrial Gearbox Solutions for industrial gearbox repair, emergency gearbox repair, or reverse engineering and replacement gearbox parts.
Repair vs. Replacement: When Bearing Installation Reveals Bigger Problems
When Bearing Replacement Is Usually Enough
Bearing replacement may be sufficient when:
- Shaft and housing fits are within tolerance
- No gear damage is present
- Lubrication system is clean and functional
- Seals are replaceable
- Failure cause is known and corrected
- Bearing seats are not fretted or spun
- Gearbox alignment is acceptable
In this case, the repair scope may include bearing replacement, seal replacement, oil change or flush, inspection, and startup verification.
When Gearbox Repair Is Recommended
A more complete gearbox repair may be necessary when inspection finds:
- Spun bearing journals
- Worn housing bores
- Cracked housings
- Damaged shafts
- Gear tooth wear or pitting
- Excessive backlash
- Misalignment from worn bearing seats
- Contaminated lubrication system
- Repeated bearing failures
- Abnormal vibration after bearing replacement
Repair options may include machining, sleeving, metalizing, housing bore restoration, shaft replacement, gear replacement, seal upgrades, and complete gearbox rebuilding.
When Replacement May Be the Better Option
Gearbox replacement may be more cost-effective when:
- The housing is severely damaged
- Multiple gears and shafts are beyond repair
- Replacement parts are unavailable or obsolete
- Downtime risk is too high
- The gearbox is undersized for the application
- Failure frequency is increasing
- Repair cost approaches replacement cost
Purchasing professionals should evaluate both immediate cost and lifecycle cost. A cheaper bearing or incomplete repair may lead to repeated downtime and higher long-term expense.
Maintenance Best Practices to Prevent Bearing Installation Failures
Standardize Bearing Installation Procedures
Create a written bearing installation procedure for your plant. Include:
- Approved tools
- Cleanliness requirements
- Measurement points
- Fit tolerances
- Heating limits
- Lubrication requirements
- Torque values
- Inspection forms
- Startup checklist
- Documentation requirements
Standardization reduces variation between mechanics and shifts.
Train Maintenance Personnel
Bearing installation requires skill. Training should cover:
- Bearing identification
- Handling practices
- Fit measurement
- Mounting tools
- Heating methods
- Hydraulic mounting
- Lubrication basics
- Failure modes
- Vibration and temperature checks
- Safety precautions
A trained mechanic is less likely to use damaging shortcuts, such as hammering bearings into place.
Use the Right Tools
Recommended bearing installation tools include:
- Bearing fitting tool kits
- Hydraulic presses
- Induction heaters
- Temperature probes
- Hydraulic nuts
- Feeler gauges
- Dial indicators
- Bore gauges
- Micrometers
- Torque wrenches
- Clean oil transfer containers
- Filter carts
- Pullers designed for bearing removal
The right tool reduces risk and improves repeatability.
Control Lubricant Cleanliness
Lubrication cleanliness should be treated as part of installation quality.
Best practices:
- Store lubricants indoors.
- Use sealed and labeled containers.
- Filter oil before filling.
- Use desiccant breathers where appropriate.
- Avoid open funnels and dirty transfer cans.
- Sample oil regularly.
- Maintain proper oil levels.
- Flush contaminated gearboxes before installing new bearings.
Document Every Installation
Documentation supports reliability improvement and warranty tracking.
Record:
- Bearing manufacturer and part number
- Installation date
- Mechanic or crew
- Shaft and housing measurements
- Lubricant used
- Preload or endplay values
- Heating temperature
- Tooling used
- Vibration baseline
- Temperature baseline
- Oil condition
- Photos of components
Good documentation helps identify patterns when similar failures occur across multiple assets.
Bearing Installation Checklist for Industrial Gearboxes
| Task | Completed? | Notes |
||||
| Confirm correct bearing part number | Yes/No | Match OEM specifications |
| Inspect packaging and bearing condition | Yes/No | Look for damage or contamination |
| Clean work area and tools | Yes/No | Prevent particle ingress |
| Inspect shaft and housing | Yes/No | Check wear, burrs, fretting |
| Measure shaft journal | Yes/No | Record readings |
| Measure housing bore | Yes/No | Record readings |
| Verify fits and tolerances | Yes/No | Compare to manufacturer data |
| Choose correct mounting method | Yes/No | Press, heat, hydraulic, sleeve |
| Apply force to correct bearing ring | Yes/No | Avoid rolling element damage |
| Verify seating against shoulder | Yes/No | Check full contact |
| Set clearance, preload, or endplay | Yes/No | Follow OEM procedure |
| Lubricate correctly | Yes/No | Confirm oil/grease type and quantity |
| Install new seals and gaskets | Yes/No | Avoid leaks and contamination |
| Check coupling alignment | Yes/No | Prevent bearing overload |
| Perform startup monitoring | Yes/No | Record vibration and temperature |
| Document installation | Yes/No | Save records for reliability history |
Safety Considerations During Bearing Installation
Mechanical Safety
Large bearings, shafts, and gearbox covers can be heavy and hazardous. Use proper lifting methods and follow lockout/tagout procedures.
Safety steps include:
- Lock out and tag out all energy sources.
- Support shafts and rotating components.
- Use rated lifting equipment.
- Keep hands clear of pinch points.
- Wear eye protection and gloves.
- Do not exceed press capacity.
- Secure heated bearings with proper tools.
- Avoid makeshift pullers or adapters.
Thermal Safety
When heating bearings:
- Use heat-resistant gloves.
- Avoid open flames.
- Monitor bearing temperature.
- Keep flammable materials away.
- Use proper handling hooks or lifting devices.
- Do not overheat sealed bearings.
Hydraulic Safety
Hydraulic mounting tools can generate high pressure.
Precautions:
- Inspect hoses and fittings.
- Use pressure-rated equipment.
- Stand clear of pressurized components.
- Follow manufacturer pressure limits.
- Release pressure before disassembly.
Authoritative Resources for Bearing Installation
Maintenance teams should use manufacturer and industry guidance when developing bearing installation procedures.
Recommended references:
- SKF bearing mounting and maintenance guidance: https://www.skf.com
- Timken bearing installation and tapered roller bearing setting resources: https://www.timken.com
- AGMA gear standards and gearbox reliability resources: https://www.agma.org
- Noria lubrication and contamination control articles: https://www.noria.com
These sources provide technical guidance on fits, clearances, lubrication, failure analysis, and best practices. Always combine general industry guidance with the gearbox OEM’s specific instructions.
Suggested Branded Images for IndustrialGearboxSolutions.com
Image 1: Technician Measuring Gearbox Shaft Journal
Alt text: Technician measuring an industrial gearbox shaft journal before proper bearing installation
Caption: Accurate shaft measurement helps confirm proper bearing fit before installation.
Suggested placement: Near the section on shaft and housing inspection.
Image 2: Induction Heater Preparing Bearing for Installation
Alt text: Industrial bearing being heated with an induction heater for controlled thermal mounting
Caption: Controlled induction heating reduces mounting force and helps prevent bearing damage.
Suggested placement: Near the mounting method section.
Image 3: Mechanic Installing Bearing into Gearbox Housing
Alt text: Mechanic installing a bearing into an industrial gearbox housing using proper tools
Caption: Proper tooling ensures force is applied to the correct bearing ring during installation.
Suggested placement: Near the key procedures section.
Image 4: Gearbox Bearing Failure Analysis
Alt text: Failed gearbox bearing showing raceway damage from improper installation or contamination
Caption: Bearing damage patterns can reveal installation, lubrication, or contamination problems.
Suggested placement: Near troubleshooting or symptoms.
Image 5: Industrial Gearbox Rebuild in Service Facility
Alt text: Industrial Gearbox Solutions rebuild team inspecting bearings gears and shafts
Caption: A complete gearbox inspection can identify whether bearing replacement or full repair is required.
Suggested placement: Near repair vs. replacement.
SEO Metadata
SEO Title
Proper Bearing Installation: Key Procedures for Industrial Gearbox Reliability
Meta Description
Learn proper bearing installation procedures for industrial gearboxes, including causes of failure, symptoms, inspection methods, troubleshooting, lubrication, prevention, and repair vs. replacement guidance.
Primary Keyword
proper bearing installation
Secondary Keywords
bearing installation procedures, industrial gearbox bearings, gearbox bearing failure, bearing mounting methods, bearing inspection, bearing lubrication, bearing preload, gearbox repair, bearing replacement
Suggested URL Slug
proper-bearing-installation-key-procedures
Search Intent
Informational and commercial investigation. The article supports users looking for bearing installation best practices, gearbox bearing troubleshooting, and professional gearbox repair or rebuilding support.
FAQs
What is the most important rule in proper bearing installation?
The most important rule is to apply mounting force only to the bearing ring being fitted. If installing a bearing onto a shaft, apply force to the inner ring. If installing into a housing, apply force to the outer ring. Never transmit force through rolling elements.
Can you hammer a bearing onto a shaft?
No. Hammering directly on a bearing can cause raceway dents, brinelling, cage damage, and misalignment. Use a proper press, fitting tool, induction heater, hydraulic nut, or approved mounting sleeve.
How hot should a bearing be for installation?
The correct heating temperature depends on bearing type, size, fit, seals, lubricant, and manufacturer guidance. Many open industrial bearings are heated in a controlled range suitable for thermal expansion, but overheating must be avoided. Always follow SKF, Timken, or OEM recommendations.
Why do new bearings fail shortly after installation?
New bearings often fail early because of contamination, incorrect fits, improper mounting force, misalignment, wrong preload, poor lubrication, or damaged shafts and housings. A new bearing cannot compensate for an out-of-tolerance gearbox component.
Should bearings be lubricated before installation?
It depends on the bearing type and gearbox lubrication method. Some bearings are pre-lubricated, while others rely on gearbox oil after startup. Always verify lubricant type, quantity, and delivery method before operation.
How do you know if a bearing fit is too tight?
Signs of an overly tight fit may include reduced internal clearance, excessive heat, high vibration, difficult rotation, or premature failure. Dimensional measurement and clearance checks are required to confirm the issue.
What causes a bearing to spin on a shaft?
A bearing can spin on a shaft when the fit is too loose, the shaft journal is worn, the bearing seat is damaged, or load conditions exceed the fit design. Spinning causes fretting, heat, and shaft damage.
Is bearing replacement enough after a gearbox failure?
Not always. If the shaft, housing, gears, seals, or lubrication system are damaged, simple bearing replacement may lead to repeat failure. A full gearbox inspection is recommended when bearing failure is severe or recurring.
How can maintenance teams prevent repeat bearing failures?
Use standardized installation procedures, measure fits, control contamination, verify lubrication, train personnel, monitor vibration and temperature, and document every installation. For recurring failures, perform root cause analysis.
When should a gearbox be sent out for professional repair?
Send a gearbox for professional repair when there is housing bore wear, shaft damage, gear damage, repeated bearing failures, abnormal vibration, oil contamination, or uncertainty about internal condition.
Key Takeaways
- Proper bearing installation is essential for industrial gearbox reliability.
- Most premature bearing failures are caused by installation errors, contamination, lubrication problems, misalignment, or incorrect fits.
- Always inspect and measure shafts, housings, shoulders, spacers, and seals before installing a new bearing.
- Never hammer directly on a bearing or transmit mounting force through rolling elements.
- Use controlled heating, hydraulic tools, or press methods appropriate for the bearing and application.
- Verify internal clearance, preload, or endplay where required.
- Clean lubrication practices are just as important as mechanical installation practices.
- Post-installation startup should include temperature, vibration, sound, and leak checks.
- Repeated bearing failure often indicates a larger gearbox problem.
- Professional inspection can help determine whether bearing replacement, gearbox repair, or full replacement is the best option.
Conclusion
Proper bearing installation is a critical reliability procedure, not a routine task to rush through during gearbox maintenance. The right process begins before the bearing is opened and continues through inspection, measurement, mounting, lubrication, reassembly, startup, and documentation. For industrial gearboxes, installation quality affects gear alignment, shaft stability, oil performance, vibration, heat, and overall asset life.
Maintenance teams that follow standardized bearing installation procedures can reduce repeat failures, improve uptime, and lower repair costs. However, if bearing failures are recurring or if inspection reveals worn shafts, damaged housings, gear wear, or lubrication contamination, the best next step is a professional gearbox evaluation.
Industrial Gearbox Solutions supports plants with gearbox inspection, bearing replacement, failure analysis, repair, rebuilding, and replacement solutions for demanding industrial applications. If you need help with a gearbox bearing issue, request support today.
FAQs
What are the key steps for proper bearing installation?
Proper bearing installation involves cleaning the shaft and housing, applying lubrication, ensuring proper alignment, and using the correct tools for installation.
Why is it important to clean the shaft and housing before installing a bearing?
Cleaning the shaft and housing removes any dirt, debris, or old lubricant that could affect the performance and lifespan of the bearing. It also ensures a smooth surface for the bearing to be installed onto.
What type of lubrication should be used during bearing installation?
It is important to use the correct type and amount of lubrication specified by the bearing manufacturer. This helps reduce friction, prevent wear, and extend the life of the bearing.
How does proper alignment impact bearing installation?
Proper alignment ensures that the bearing is installed in a way that allows it to operate smoothly and efficiently. Misalignment can lead to premature wear and failure of the bearing.
What are the recommended tools for bearing installation?
The recommended tools for bearing installation include bearing pullers, bearing heaters, and hydraulic presses. These tools help ensure that the bearing is installed correctly and securely.