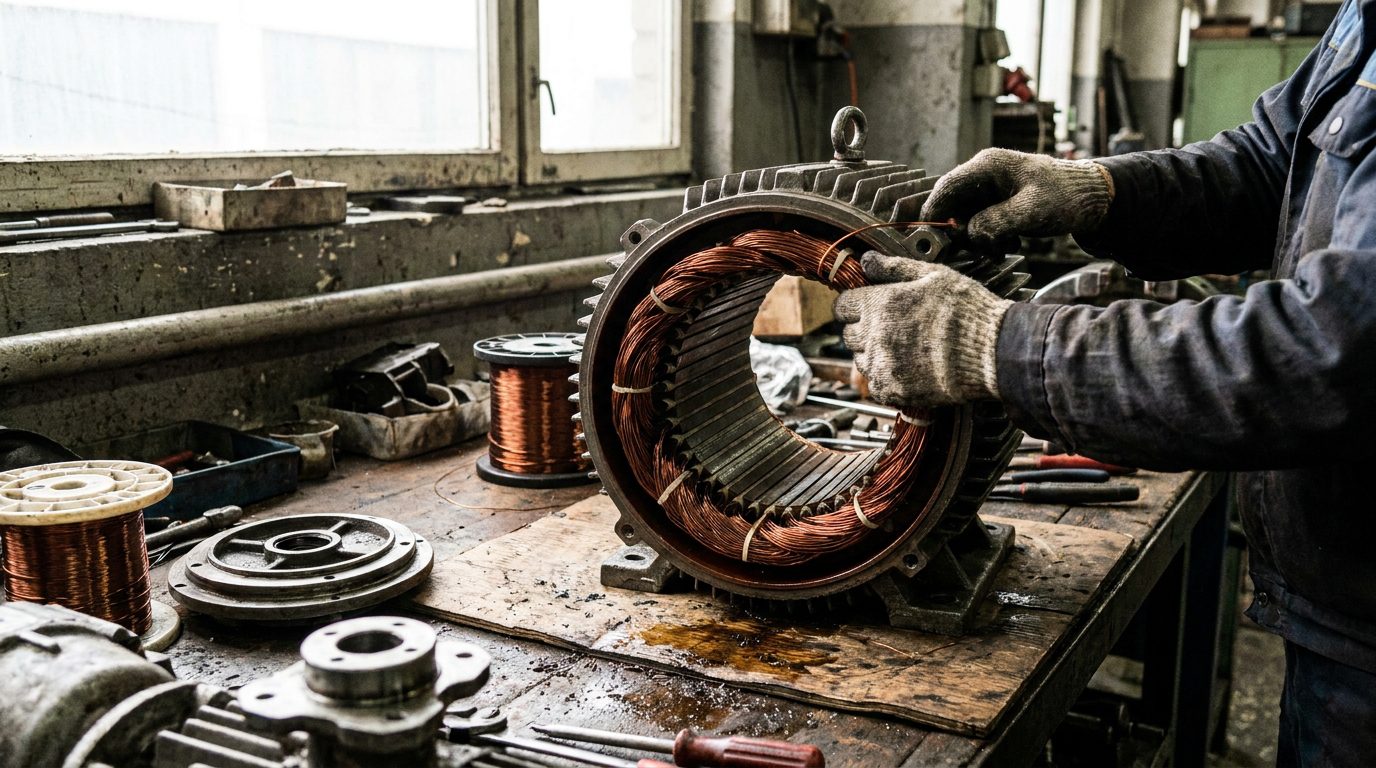
The hum of industry relies on the steadfast performance of electric motors. When these vital components falter, the ripple effect can disrupt entire production lines, leading to costly downtime and lost revenue. One of the most common and effective remedies for a motor experiencing electrical issues is a rewind. But what exactly does an electric motor rewind entail? This comprehensive guide will demystify the process, providing plant managers, maintenance teams, engineers, buyers, and industrial operators with the knowledge they need to understand this critical repair, its implications, and how to make informed decisions regarding their motor fleet. We’ll delve into the causes of motor failure, the warning signs to watch for, the diagnostic steps involved, the nuances of repair versus replacement, associated costs, inherent risks, and proactive prevention strategies.
When exploring the intricacies of electric motor rewinding, it’s also beneficial to understand the broader context of industrial machinery maintenance. A related article that delves into the repair and upkeep of gearboxes, which are often integral to motor systems, can provide valuable insights. You can read more about this in the article on industrial gearbox repair in Richmond, KY, available at Industrial Gearbox Repair in Richmond, KY. This resource highlights essential practices and considerations for maintaining the efficiency and longevity of industrial equipment.
Understanding Electric Motor Failure: More Than Just a Spark
Electric motors are the workhorses of modern industry, converting electrical energy into mechanical power that drives pumps, conveyors, fans, and countless other essential machines. However, like any mechanical or electrical apparatus, they are subject to wear and tear, environmental stresses, and operational demands that can lead to failure. Understanding the common causes of motor failure is the first step in preventing costly breakdowns and implementing effective repair strategies.
Thermal Degradation: The Silent Killer
One of the most prevalent culprits behind motor failure is thermal degradation. This occurs when the motor’s insulation system, primarily the winding insulation, is exposed to excessive heat over time. When insulation breaks down, it loses its ability to prevent electrical current from flowing between adjacent wires or from wires to the motor’s grounded frame.
- Overloading: Pushing a motor beyond its rated capacity for extended periods generates excessive heat. This can happen if a driven load increases unexpectedly or if the motor is undersized for its application.
- Frequent Starts/Stops: Each time a motor starts, it draws a significantly higher current than when running. Frequent cycling, especially in applications with short duty cycles, can lead to cumulative heat buildup.
- Poor Ventilation: A motor’s cooling system is critical. Obstructed cooling fins, clogged air passages, or a malfunctioning fan can prevent heat dissipation, leading to internal overheating.
- High Ambient Temperatures: Operating motors in environments with already high temperatures exacerbates the heat generated by the motor itself, accelerating insulation breakdown.
- Voltage Imbalances and Low Voltage: Uneven voltage distribution across the motor’s windings can cause some coils to overheat, while low voltage can lead to increased current draw to maintain torque, also generating excess heat.
- Bearing Failures: While not directly electrical, failing bearings can create increased friction, leading to higher motor temperatures and potential damage to the winding insulation.
Contamination: The Unseen Enemy
The industrial environment is often harsh, and contaminants can wreak havoc on motor integrity.
- Moisture and Humidity: Water and high humidity can compromise insulation, leading to short circuits. This is particularly problematic in wet or washdown environments.
- Chemicals and Corrosive Agents: Exposure to certain chemicals can degrade insulation materials, making them brittle and susceptible to cracking.
- Dust and Dirt: Accumulated dust and dirt can clog ventilation passages, restrict airflow, and, in some cases, become conductive, creating electrical pathways where they shouldn’t exist. Airborne conductive particles, like carbon dust from brushes in brushed DC motors or metallic dust, can be particularly damaging.
Mechanical Stress and Vibration: The Physical Toll
While rewinding is primarily an electrical repair, mechanical issues can directly lead to or exacerbate electrical problems.
- Vibration: Excessive vibration, often caused by unbalanced rotors, misaligned couplings, or worn bearings, can lead to insulation fatigue and eventual cracking. The constant jostling can also loosen electrical connections.
- Shaft Misalignment: When a motor shaft is not perfectly aligned with the driven equipment, it creates stress on the motor bearings and can induce torsional vibrations that affect the windings.
- Bearing Wear and Failure: As mentioned earlier, worn bearings increase friction and heat. More critically, a seized bearing can lock up the rotor, leading to extreme current draw and immediate motor burnout.
Electrical Faults: The Direct Impact
Sometimes, the electrical system itself is the primary cause of motor failure.
- Short Circuits: This is the most common reason for a rewind. A short circuit occurs when there’s an unintended low-resistance path for current. This can be between windings (turn-to-turn shorts), between a winding and ground (ground faults), or between phases.
- Open Circuits: An open circuit means a break in the electrical path, preventing current flow. This typically results in a loss of power to that winding.
- Voltage Surges and Spikes: Sudden, high-voltage transients, often caused by lightning strikes or switching operations in the power grid, can exceed the insulation’s dielectric strength, causing it to break down.
Warning Signs: Listening to Your Motor’s Distress Calls
Early detection of motor problems can prevent catastrophic failures and costly emergency repairs. Maintenance teams and operators should be vigilant for the following warning signs:
Auditory Clues: The Sound of Trouble
- Unusual Noises: Humming, buzzing, grinding, or knocking sounds emanating from the motor can indicate bearing problems, rotor imbalance, or loose internal components. A distinct electrical hum might suggest winding issues or voltage imbalances.
- Increased Noise Level: A gradual increase in the motor’s operating noise without an apparent change in load or speed can signify developing problems.
Visual Indicators: Seeing the Signs
- Overheating/Discoloration: Discoloration of the motor housing, particularly around ventilation openings, can indicate excessive internal heat. Signs of melted insulation or burnt wiring are clear indicators of severe electrical issues.
- Smoke or Burning Odor: This is a critical warning sign of imminent failure and often indicates severe insulation breakdown and electrical arcing. The motor should be shut down immediately.
- Oil Leaks: Leaks from motor bearings can indicate bearing wear or seal failure, which can lead to lubrication issues and overheating.
- Loose Connections: Visually inspecting terminal boxes for loose, corroded, or burnt connections is crucial.
Performance Degradation: Not Performing as Expected
- Reduced Speed or Torque: If the motor struggles to maintain its rated speed or torque under normal load conditions, it suggests internal electrical problems or excessive friction.
- Overheating: Touching the motor housing (carefully, with appropriate safety measures) and detecting excessive heat beyond normal operating temperatures is a strong indicator of an issue. Infrared thermometers can provide more accurate, non-contact measurements.
- Tripping Circuit Breakers or Blown Fuses: Frequent tripping of protective devices often points to overcurrent situations, which can be caused by short circuits, overloads, or voltage anomalies.
Electrical Readings: The Technical Diagnostics
- Increased Amperage Draw: Monitoring motor current with a clamp-on ammeter can reveal abnormally high readings, indicative of short circuits, overloads, or voltage imbalances.
- Irregular Voltage Readings: Checking voltage at the motor terminals can identify voltage imbalances between phases, which can lead to unequal heating and premature failure.
Check out our blog for more articles on industrial gearbox solutions: more articles.
Diagnosing the Issue: Pinpointing the Root Cause
Before a rewind can be considered, a thorough diagnosis is essential to identify the precise nature and location of the motor’s failure. This involves a combination of visual inspection, electrical testing, and sometimes mechanical analysis.
Initial Inspection and Assessment
The process begins with a physical examination of the motor and its surrounding environment.
- Visual Inspection: A technician will look for obvious signs of damage such as burns, melted insulation, debris blockage, or loose connections. The condition of the fan, bearings, and enclosure is also assessed.
- Environmental Check: The ambient temperature, presence of dust, moisture, or chemical exposure is noted, as these can be contributing factors.
- Load Assessment: Understanding the typical load the motor operates under is crucial. Any recent changes in the driven equipment or operational demands are investigated.
Electrical Testing: Unveiling the Hidden Problems
A suite of electrical tests is performed to assess the integrity of the windings and insulation.
- Insulation Resistance (Megger) Test: This is a fundamental test using a megohmmeter (megger) to measure the resistance between windings and to ground. A low resistance reading indicates compromised insulation, suggesting potential for short circuits or ground faults. Typical acceptable readings for a motor in good condition are in the megaohms range.
- Interpreting Megger Readings: Readings that are consistently low, or that decrease significantly over time, are cause for concern. The acceptable resistance value depends on the motor’s voltage rating and temperature. Standards like NEMA (National Electrical Manufacturers Association) provide guidelines for acceptable insulation resistance values.
- Winding Resistance Test: This test measures the resistance of each individual winding. Significant differences in resistance between windings (typically more than 1-2%) can indicate turn-to-turn shorts or other winding damage.
- Surge/Impulse Testing: This advanced test injects a high-voltage pulse into the windings. The resulting waveform is analyzed to detect subtle insulation weaknesses, turn-to-turn faults, and coil shorts that might not be apparent with lower voltage tests. This is particularly useful for detecting problems in larger or critical motors.
- Polarization Index (PI) Test: This test, often performed in conjunction with the megger test, measures the ratio of insulation resistance after 10 minutes to the resistance after 1 minute. A PI of 2 or higher generally indicates good, clean insulation. A low PI can suggest moisture or contamination within the insulation system.
- Hi-Pot (High Potential) Test: This test applies a high voltage (typically 1.5 to 2 times the motor’s rated voltage plus 1000 volts) for a short duration to stress the insulation. If the insulation breaks down, the test will indicate a fault. This is a more aggressive test than the megger test and should be performed with caution.
- Phase-to-Phase Voltage and Current Balance: Using a multimeter or power quality analyzer, technicians check the voltage supplied to each phase of the motor and the current drawn by each winding under load. Significant imbalances can point to internal motor issues or upstream electrical problems.
Mechanical Diagnostics: Addressing Underlying Issues
While electrical tests are primary for rewind decisions, mechanical factors are also assessed.
- Bearing Inspection: Bearings are checked for play, roughness, and signs of wear or damage.
- Shaft Alignment Verification: If misalignment is suspected, laser alignment tools can be used to confirm and correct the issue.
- Rotor Balancing Assessment: For critical applications or if vibration is a significant concern, rotor balance may be evaluated.
Understanding the intricacies of electric motor rewinding can be quite enlightening, especially when considering the broader context of industrial machinery maintenance. For those interested in how various components work together, a related article on industrial gearbox repair provides valuable insights into the importance of keeping these systems in optimal condition. You can explore this topic further by visiting industrial gearbox repair, where you’ll find information on the processes and benefits of maintaining gearboxes, which are essential for the overall performance of electric motors.
The Rewind Process: Breathing New Life into Your Motor
An electric motor rewind is a meticulous process that involves dismantling the motor, replacing damaged winding insulation, and reassembling the unit with the original or equivalent specifications. It’s a testament to the repairability of well-engineered equipment.
Step 1: Disassembly and Initial Assessment
The motor is carefully disassembled, often by a specialized motor repair shop.
- Motor Teardown: The motor is taken apart, starting with the end bells, rotor, and stator.
- Detailed Inspection: Once disassembled, a more in-depth inspection of all components is performed. This includes checking the rotor for damage, the shaft for straightness, the bearings, the fan, and the integrity of the stator core.
- Winding Examination: The original windings are examined to pinpoint the exact location and nature of the fault. This might involve visual inspection, continuity tests, or even carefully stripping sections of insulation to reveal damage.
Step 2: Winding Removal and Stator Cleaning
The damaged windings are carefully removed to prepare the stator for new insulation.
- Winding Extraction: The old windings are typically burned out using a controlled burnout oven or are mechanically removed. Burning out is a common method where the windings are heated to a temperature that degrades the insulation, making them easier to remove.
- Stator Core Cleaning: After winding removal, the stator core laminations are thoroughly cleaned to remove any residual insulation material, varnish, or debris. Any damaged or loose laminations are repaired or replaced to ensure optimal magnetic performance. This cleaning is critical to prevent future shorts and ensure efficient operation.
Step 3: Slot Liner Installation and New Winding Insertion
New insulation is meticulously applied, followed by the fresh copper windings.
- Slot Liner Installation: High-quality insulating materials, such as polyester film, Nomex®, or Kapton®, are precisely cut and inserted into the stator slots. These slot liners act as the primary barrier between the copper windings and the stator core, preventing ground faults.
- Winding Coil Preparation: New copper wire, with insulation that meets or exceeds the original specifications, is formed into coils. The number of turns, wire gauge, and insulation type are critical and must match the original motor design.
- Coil Insertion: The prepared coils are carefully inserted into the stator slots, following a specific pattern determined by the motor’s design. This is a labor-intensive process that requires precision to avoid damaging the new insulation.
- Wedge Installation: Insulating wedges are driven into the top of the slots to secure the coils and protect them from vibration and potential damage.
Step 4: Varnish Treatment and Curing
The newly wound stator undergoes a crucial varnishing process to enhance insulation and protection.
- Varnish Impregnation: The wound stator is submerged in a high-quality insulating varnish. This varnish fills any voids between the coils, the slot liners, and the wedges, providing superior electrical insulation, mechanical stability, and protection against moisture, chemicals, and dirt.
- Curing: After impregnation, the stator is baked in a specialized oven. The heat cures the varnish, creating a hard, protective coating that significantly enhances the winding’s durability and lifespan. Multiple coats of varnish may be applied for maximum protection.
Step 5: Reassembly and Final Testing
The motor is meticulously reassembled, and rigorous testing ensures it meets performance standards.
- Rotor Installation: The rotor is carefully placed back into the stator.
- End Bell and Bearing Reassembly: The end bells are reattached, and new bearings, if required, are installed.
- Final Assembly: The motor is fully assembled, including the fan, terminal box, and any external components.
- Final Electrical Testing: Before leaving the repair shop, the rewound motor undergoes a series of comprehensive tests to verify its performance and reliability. These typically include:
- Insulation Resistance Test: To confirm the integrity of the new insulation.
- Winding Resistance Test: To ensure even resistance across windings.
- No-Load Test: The motor is run without any load to check for smooth operation, correct speed, and absence of unusual noise or vibration. Current draw is also monitored.
- Load Test (Optional but Recommended): The motor is run under a specific load to verify its performance under operational conditions, including torque, speed, and current draw.
- Surge/Impulse Test: This may be performed again on the rewound motor to ensure the new windings can withstand electrical stress.
- Data Recording: All test results are meticulously recorded, providing a performance baseline for future reference.
When considering the intricacies of electric motor rewinding, it’s essential to understand the broader context of machinery maintenance and efficiency. A related article that delves into the operational aspects of industrial equipment is available at Centrifugal Pumps, which explores how proper upkeep can enhance performance and longevity. This connection highlights the importance of regular maintenance practices across various types of machinery, ensuring optimal functionality and reducing the need for extensive repairs like rewinding.
Repair vs. Replacement: A Critical Decision
The decision to rewind or replace an electric motor is a complex one, involving a careful consideration of costs, downtime, performance requirements, and lead times.
Factors Favoring a Rewind
- Cost-Effectiveness: For many medium to large motors, rewinding can be significantly cheaper than purchasing a new, equivalent motor. This is especially true for specialized or obsolete motor types.
- Reduced Downtime: While a rewind does involve downtime, it can often be faster than sourcing and procuring a new, specialized motor, particularly if a suitable replacement is not readily available.
- Preservation of Original Specifications: A quality rewind restores the motor to its original performance characteristics, which is crucial for applications with tight operational tolerances or where a specific motor design is optimized for a particular process.
- Environmental Considerations: Rewinding is a more sustainable option, reducing waste by repurposing the existing motor frame and core.
- Familiarity and Integration: The rewound motor is already integrated into the existing system, simplifying installation and potentially avoiding the need for modifications to mounting or drive components.
Factors Favoring Replacement
- Significant Internal Damage: If the motor’s core laminations are severely damaged, or if the housing is compromised, replacement might be more economical than attempting extensive repairs in addition to a rewind.
- Outdated Technology or Inefficiency: Older motors may be less energy-efficient than modern replacements. If energy savings are a significant consideration, replacing the motor with a higher-efficiency model (e.g., NEMA Premium®) can offer long-term cost benefits, even if the initial cost is higher.
- Obsolescence and Availability of Parts: For very old or uncommon motor types, finding replacement parts for a rewind might become difficult or prohibitively expensive.
- Upgrade in Performance Requirements: If the application’s demands have increased beyond the original motor’s capabilities, replacing it with a higher-rated or specialized motor may be necessary.
- Short Lead Times: In cases of extreme urgency and when a direct replacement is readily available off-the-shelf, purchasing a new motor might be the fastest solution.
- Extended Warranty: New motors typically come with a manufacturer’s warranty, which can provide an added layer of security.
The Cost Equation
The cost of rewinding varies widely depending on motor size (horsepower), voltage, complexity, and the repair shop’s rates. Generally, rewinding costs can range from 30% to 70% of the cost of a new motor.
- Motor Size: Larger motors naturally cost more to rewind due to the increased amount of copper and labor involved.
- Material Costs: The price of copper and insulating materials fluctuates, impacting rewind costs.
- Labor Intensity: The skill and time required for winding, varnishing, and testing contribute significantly to the cost.
- Additional Repairs: If the motor requires other repairs, such as bearing replacement, shaft repair, or housing refurbishment, these will add to the overall cost.
- Expedited Service: Requesting faster turnaround times often incurs additional charges.
The cost of a new motor is driven by its horsepower, efficiency rating, enclosure type, and brand. Energy-efficient motors, while more expensive upfront, can lead to substantial savings in electricity costs over their lifespan.
Risks Associated with Rewinding
While a rewind is a common and effective repair, there are inherent risks that must be managed.
- Compromised Insulation Quality: Not all rewind shops are created equal. Poor quality materials, improper varnishing techniques, or inadequate curing can lead to premature winding failure, negating the benefits of the rewind.
- Mechanical Damage During Disassembly/Reassembly: Improper handling during the teardown and reassembly process can lead to nicks or damage to the stator core, rotor, or other components.
- Incorrect Winding Specifications: Using the wrong wire gauge, number of turns, or insulation type can result in a motor that performs poorly, overheats, or has a reduced lifespan.
- Failure to Address Root Cause: If the underlying reason for the motor failure (e.g., lubrication issues, misalignment, voltage problems) is not identified and corrected, the rewound motor is likely to fail again prematurely.
- Extended Downtime: If the rewind process is not managed efficiently, or if unforeseen issues arise, the motor can be out of service for longer than anticipated, leading to significant production losses.
- Reduced Efficiency: While a good rewind aims to restore original performance, subtle compromises in winding techniques or material variations can sometimes lead to a slight reduction in motor efficiency compared to a brand-new, high-efficiency motor.
Prevention: The Best Defense is a Good Offense
Proactive maintenance and operational best practices are crucial for extending motor life and minimizing the need for costly rewinds.
Robust Maintenance Programs
- Regular Inspections: Implement a schedule for routine visual and auditory inspections of all critical motors.
- Lubrication Management: Ensure bearings are lubricated correctly and at appropriate intervals using the recommended lubricants.
- Cleaning and Ventilation: Regularly clean motor enclosures, cooling fins, and ventilation passages to ensure optimal airflow and prevent overheating.
- Vibration Monitoring: Utilize vibration analysis tools to detect early signs of bearing wear, rotor imbalance, or misalignment.
- Thermal Imaging: Employ infrared thermography to identify hot spots in motor windings or connections, indicating potential insulation degradation or loose connections.
Operational Best Practices
- Proper Motor Sizing: Ensure motors are correctly sized for their applications to avoid continuous overloading.
- Load Management: Avoid sudden, excessive load increases. Implement soft starters or variable frequency drives (VFDs) where appropriate to manage starting currents and control speed.
- Voltage and Power Quality Monitoring: Regularly monitor incoming power quality for voltage imbalances, sags, and surges. Address any anomalies promptly.
- Environment Control: Where possible, protect motors from excessive moisture, dust, and corrosive environments. Consider enclosed or specialized motors for harsh conditions.
- Proper Alignment and Coupling: Ensure accurate alignment between the motor and driven equipment. Regularly inspect couplings for wear.
Partnering with Experts
- Qualified Repair Shops: Choose reputable motor repair shops with a proven track record, certified technicians, and robust testing procedures.
- Preventive Maintenance Contracts: Consider engaging with service providers for comprehensive motor maintenance programs.
Frequently Asked Questions About Motor Rewinding
Q1: How long does an electric motor rewind typically take?
The duration can vary significantly. A small motor rewind might take a few days, while a large, complex motor could take several weeks. Factors include the shop’s workload, the motor’s size and complexity, and the availability of parts. Expedited services are often available at an additional cost.
Q2: What is the lifespan of a rewound motor compared to a new one?
A properly executed rewind by a reputable shop can restore a motor to approximately 80-95% of its original lifespan. However, the lifespan of a rewound motor is also dependent on the original motor’s quality and the operating conditions it is subjected to.
Q3: Can a motor be rewound multiple times?
Yes, a motor can be rewound multiple times, provided that the stator core laminations remain in good condition and are not significantly damaged during the process. Each rewind involves removing insulation, and over many rewinds, some degradation of the core material can occur, potentially affecting magnetic efficiency.
Q4: What are the cost implications of rewinding versus replacing an electric motor?
Generally, rewinding a medium to large motor is less expensive than purchasing a new equivalent motor, often saving 30-70%. However, for smaller motors or when considering energy efficiency upgrades, replacement might become more cost-effective.
Q5: How can I ensure the quality of a motor rewind?
Choose a repair shop with good certifications (e.g., EASA accredited), ask for references, inquire about their testing procedures, and request a detailed report of the work performed and the results of all tests. A warranty on the rewind work is also a good indicator of quality.
Conclusion: The Value of an Informed Approach to Motor Maintenance
Electric motor rewinding is not merely a repair; it’s a restoration process that can significantly extend the life of valuable industrial assets. By understanding the causes of motor failure, recognizing the warning signs, and appreciating the intricacies of the rewind process, plant managers, maintenance teams, engineers, buyers, and operators can make informed decisions that optimize uptime, reduce costs, and enhance operational efficiency. A proactive approach to motor maintenance, coupled with a judicious assessment of repair versus replacement options, will ensure the continued, reliable operation of the machinery that powers our industrial world.